How to Carve a Halloween Pumpkin

(versione italiana)

I know this post of mine has absolutely nothing to do with the cycling world, but, before being a cycling lover, I am completely in love with my children and I spent yesterday afternoon carving some pumpkins with and for them.

Then I was asked how to make them and now…here I am…

Now, waiting for my next cycling ride (it the weather lets me…), here are the instructions!

PS: All the pictures of this post hsve been taken yesterday by my eldest daughter, who is six years old. Without her support I coudn’t have published this post. I love you, my sweetheart!

What you need:

1 washable marker
1 sharp knife
1 spoon
1 ice cream scoop
1 candle
Plenty of newspaper to protect work surface
Large bowl for pumpkin seeds and flesh

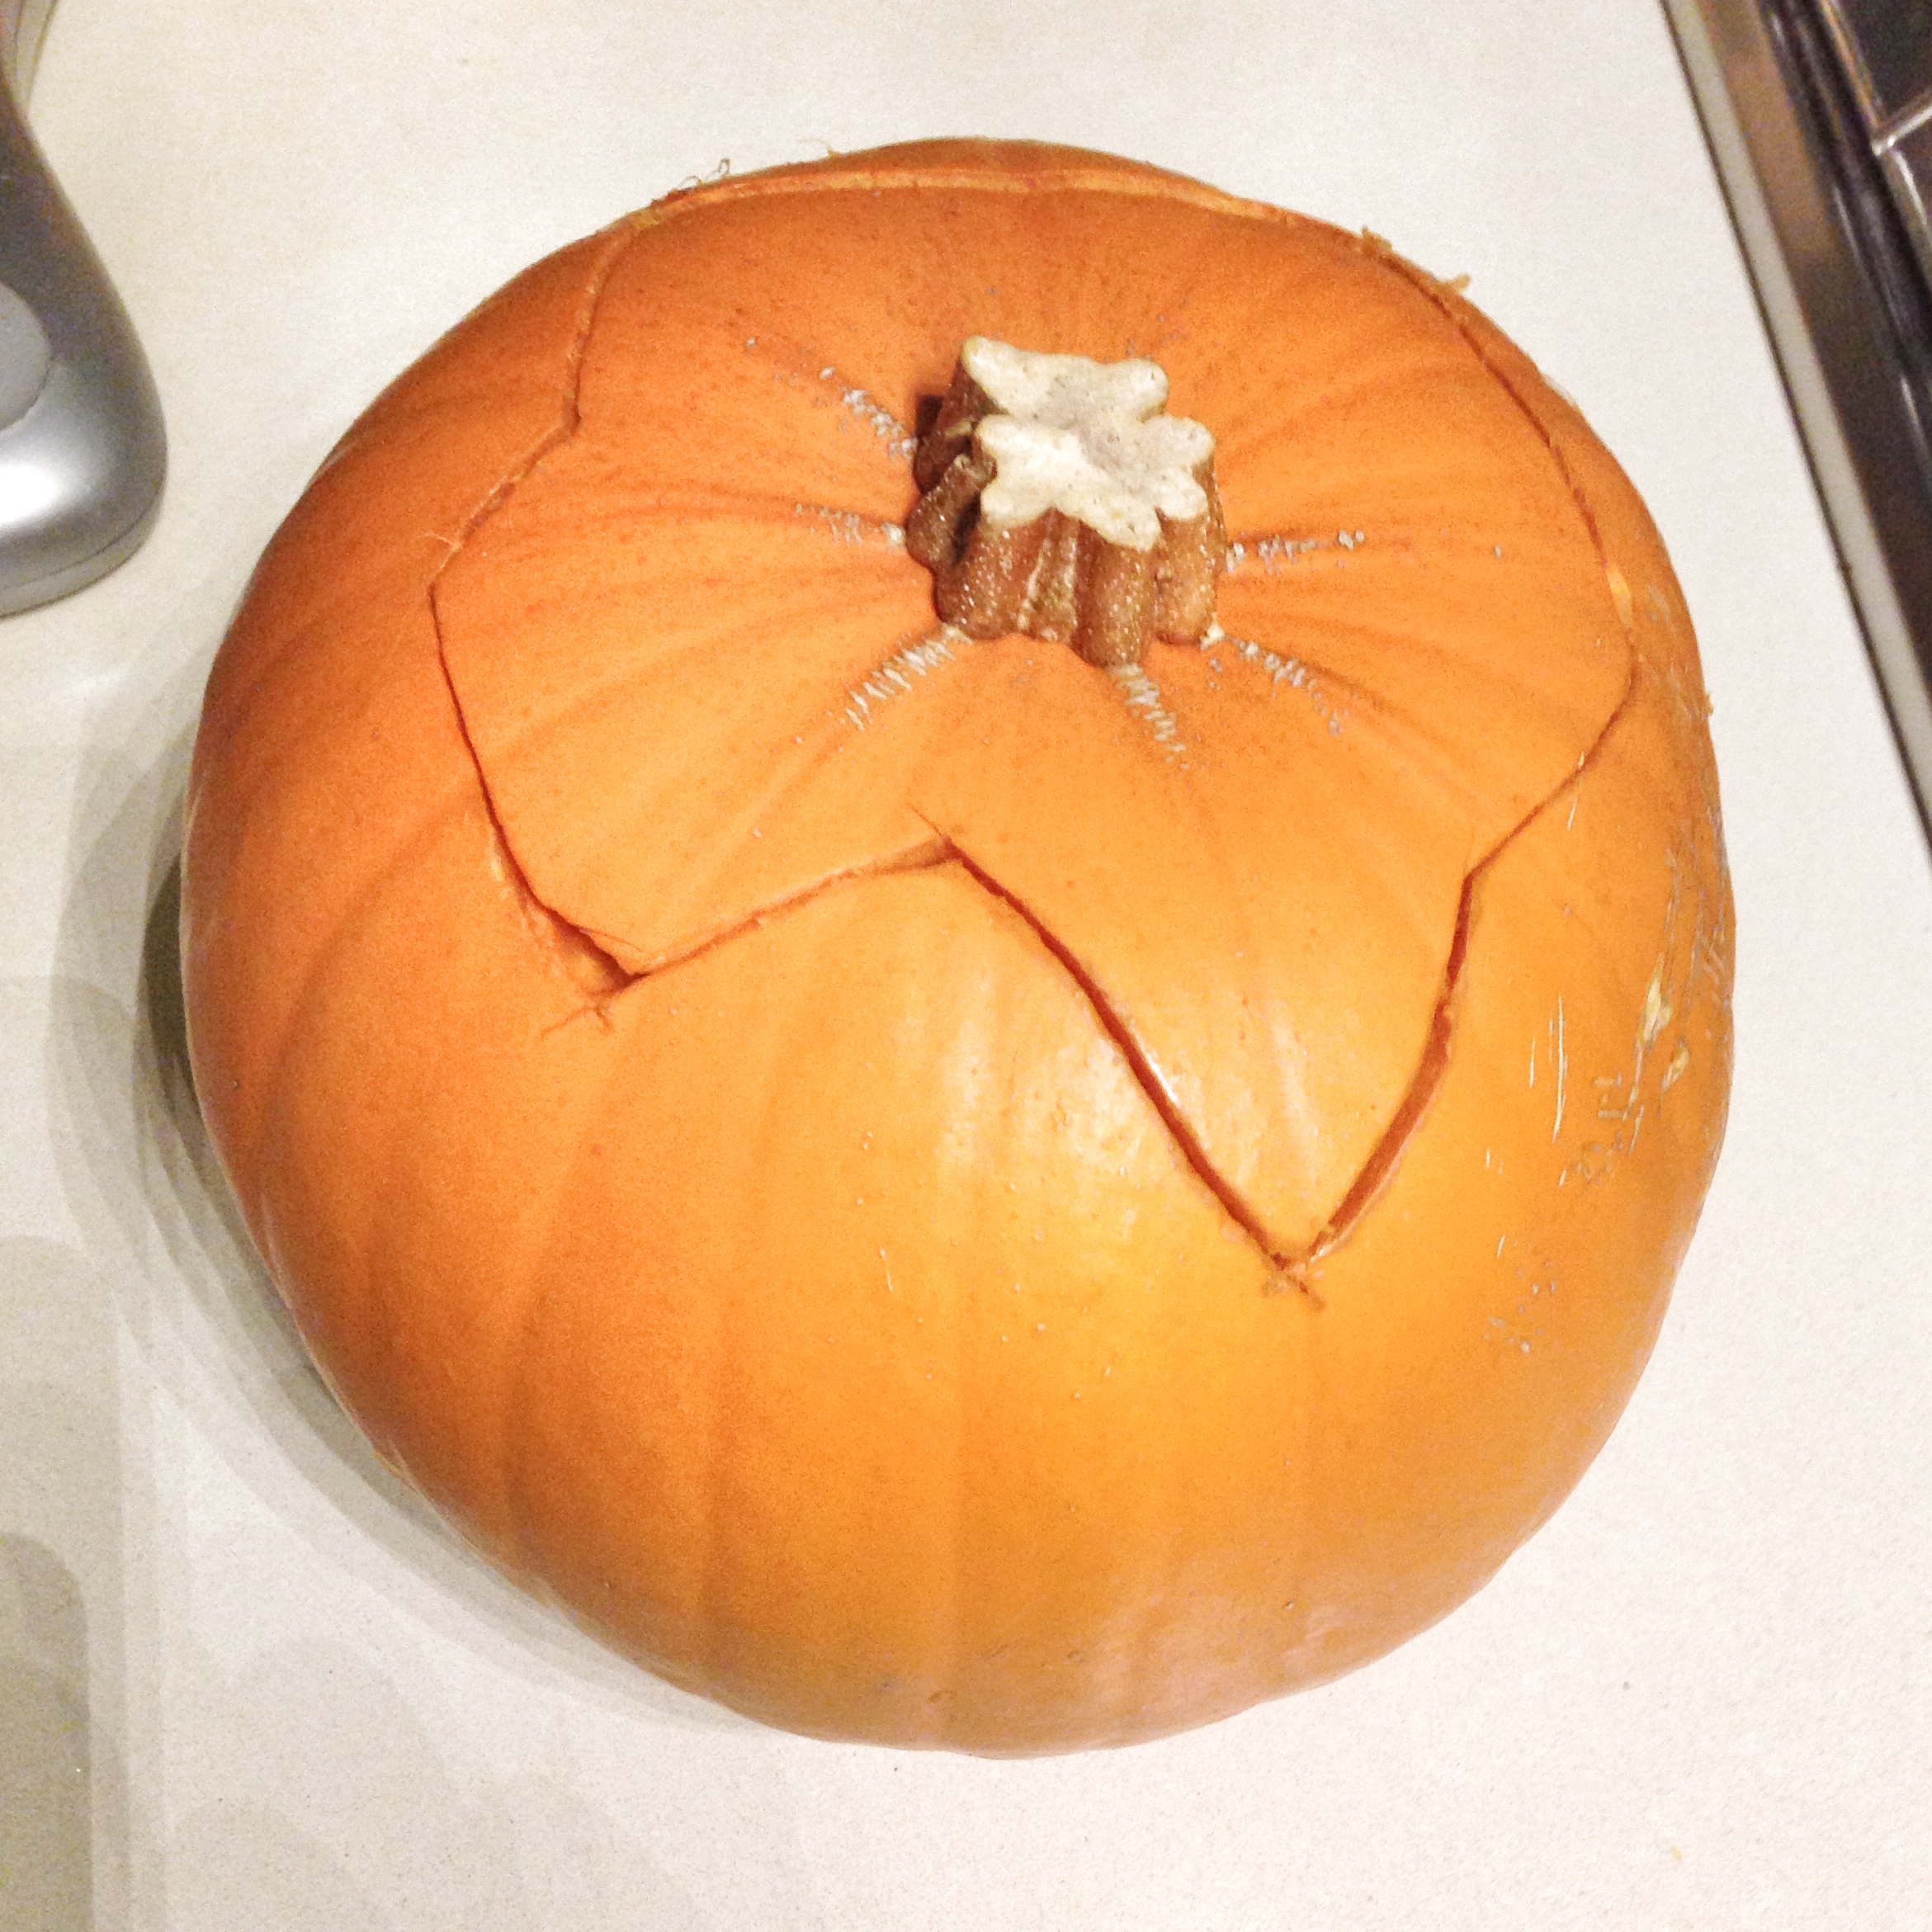
Wash the pumpkin in warm water. I added some baking soda to get rid of any possibile bacteria. Draw a kind of a circle around the stalk with a washable marker. Take a sharp knife and cut the hole.  Now remove the top.

wash the pumpkin

Remember to tilt the point of the knife into the centre of the pumpkin. This way, it will prevent the lid from falling in.

carving a halloween pumpkin

Scoop the inside of the pumpkin

Scoop out flesh, pulp, and seeds with your hands at first, and then with a spoon or an ice cream scoop, which works perfectly for this. If you don’t feel like putting your hands into the pumpkin, use a pair of disposable gloves.

IMG_3367

carve the pumpkin

You are now ready to carve! The pumpkins I bought had already   “pumpkin face” stickers on them, so it was easy to choose the design.. If you are using a stencil, transfer your paper stencil onto the pumpkin and trace the design by poking holes with a skewer or a sharp tool.

Trace the design by poking holes

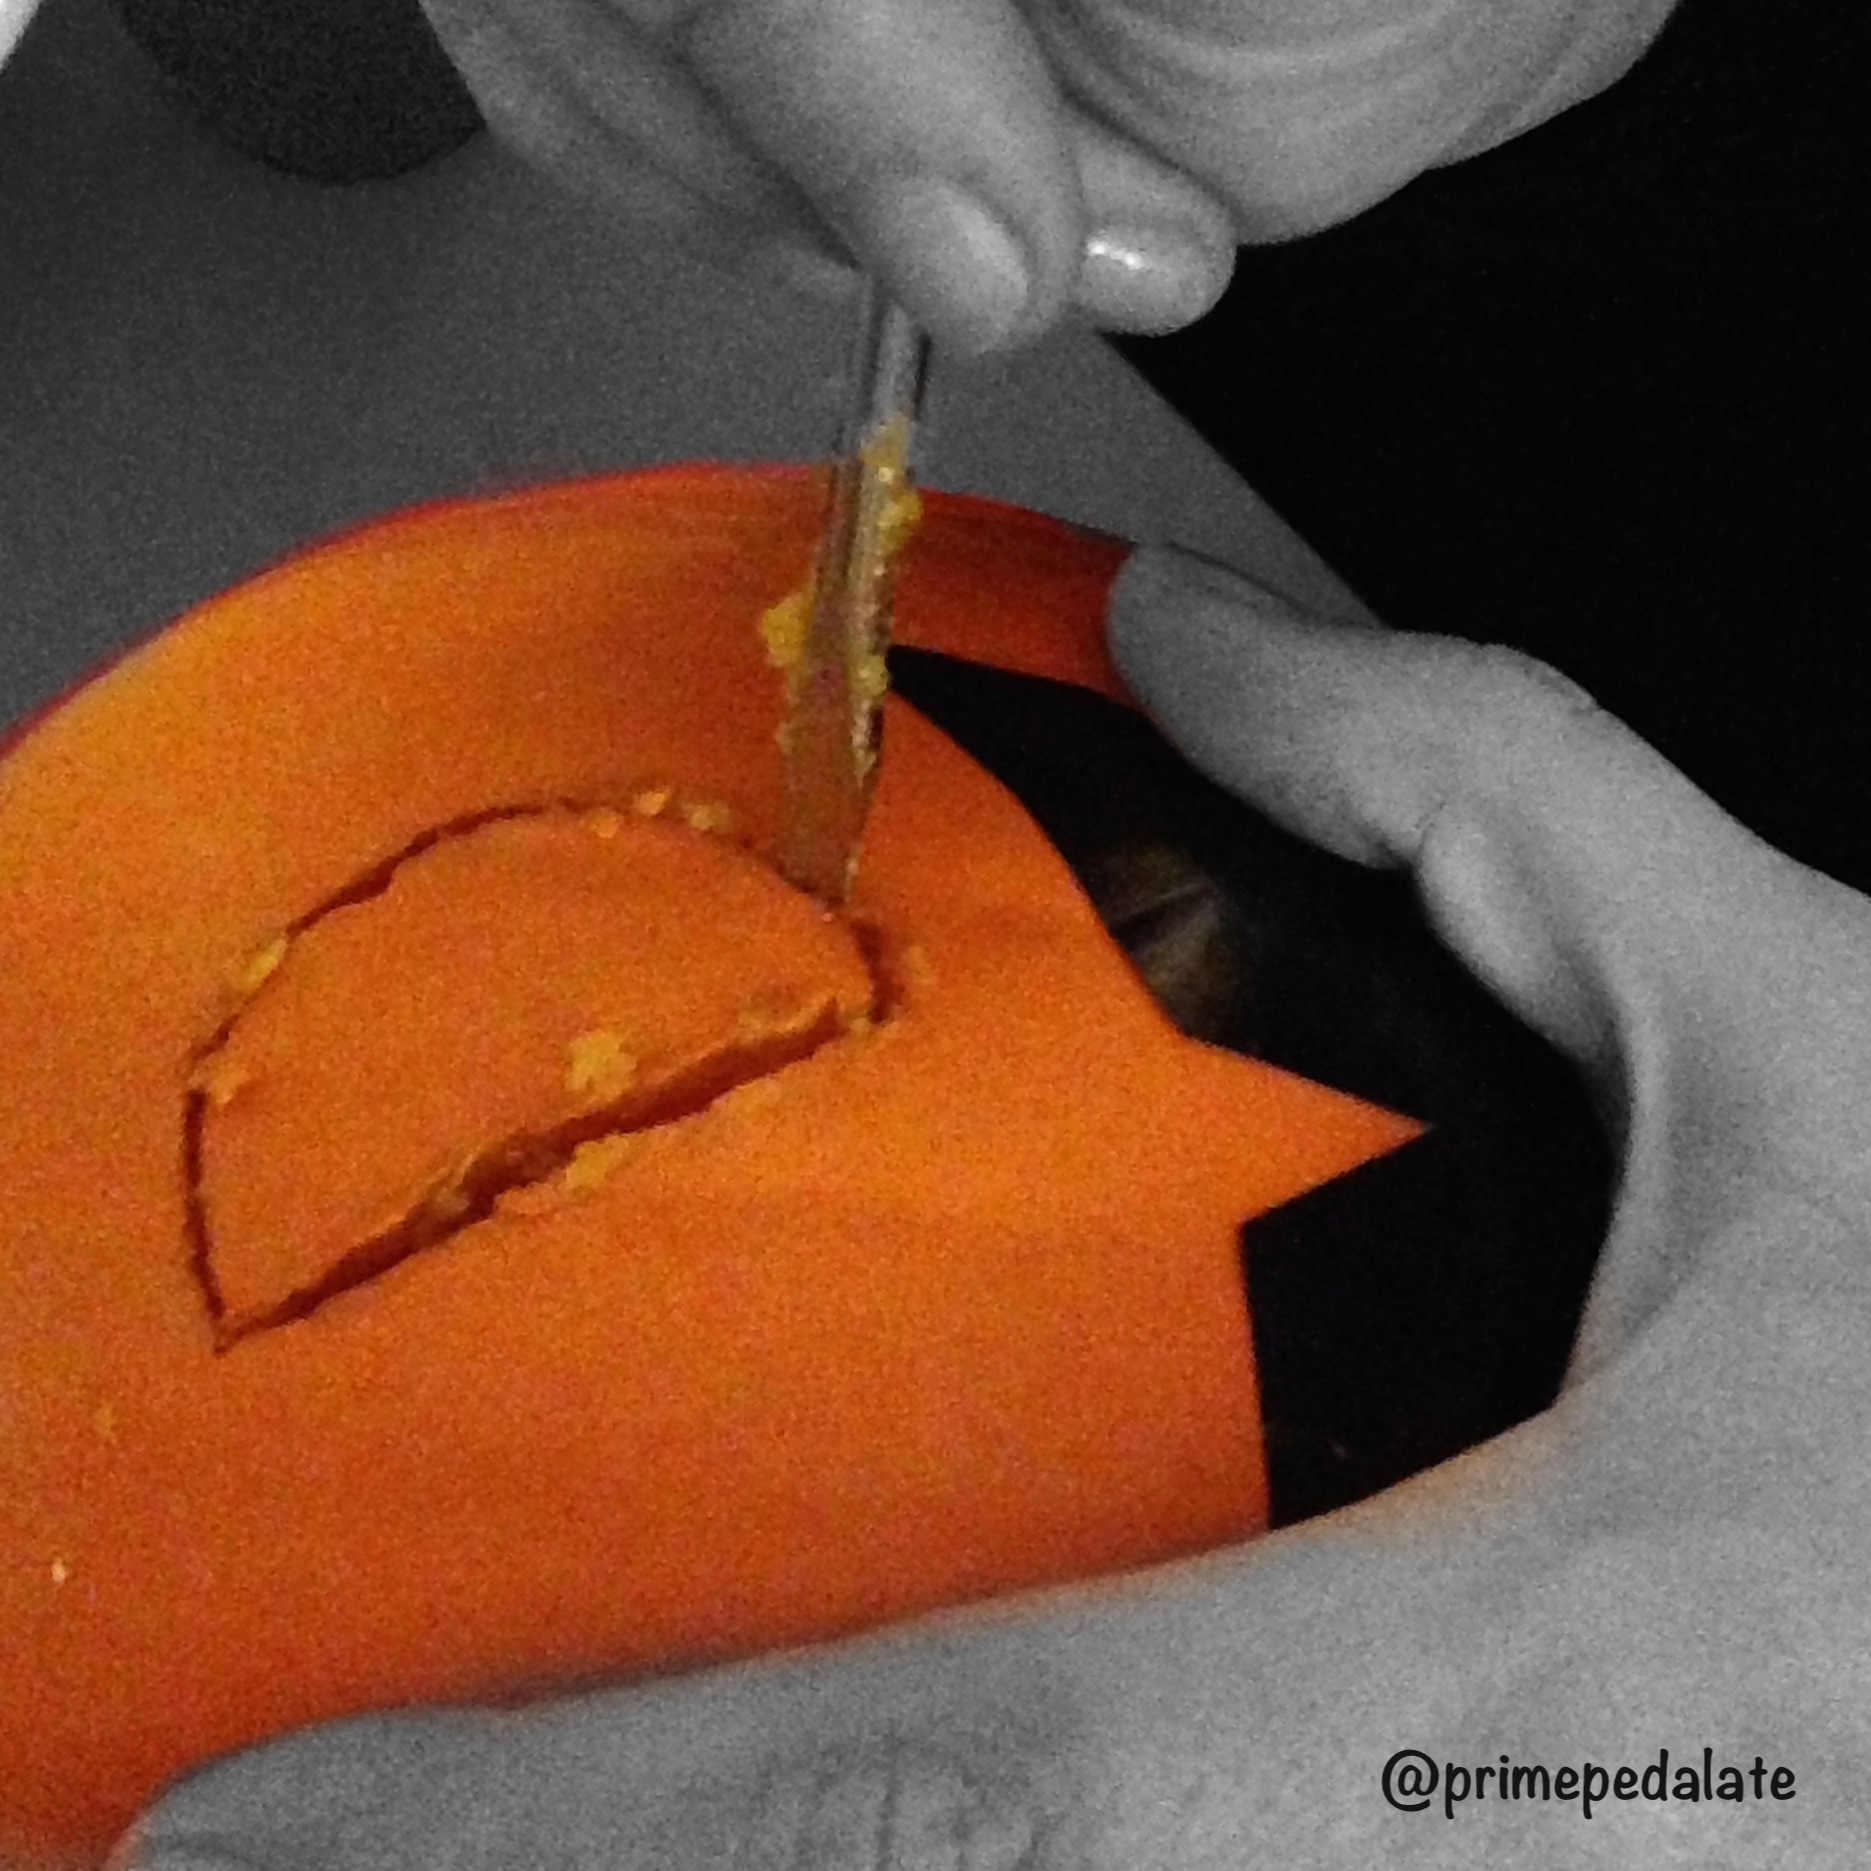
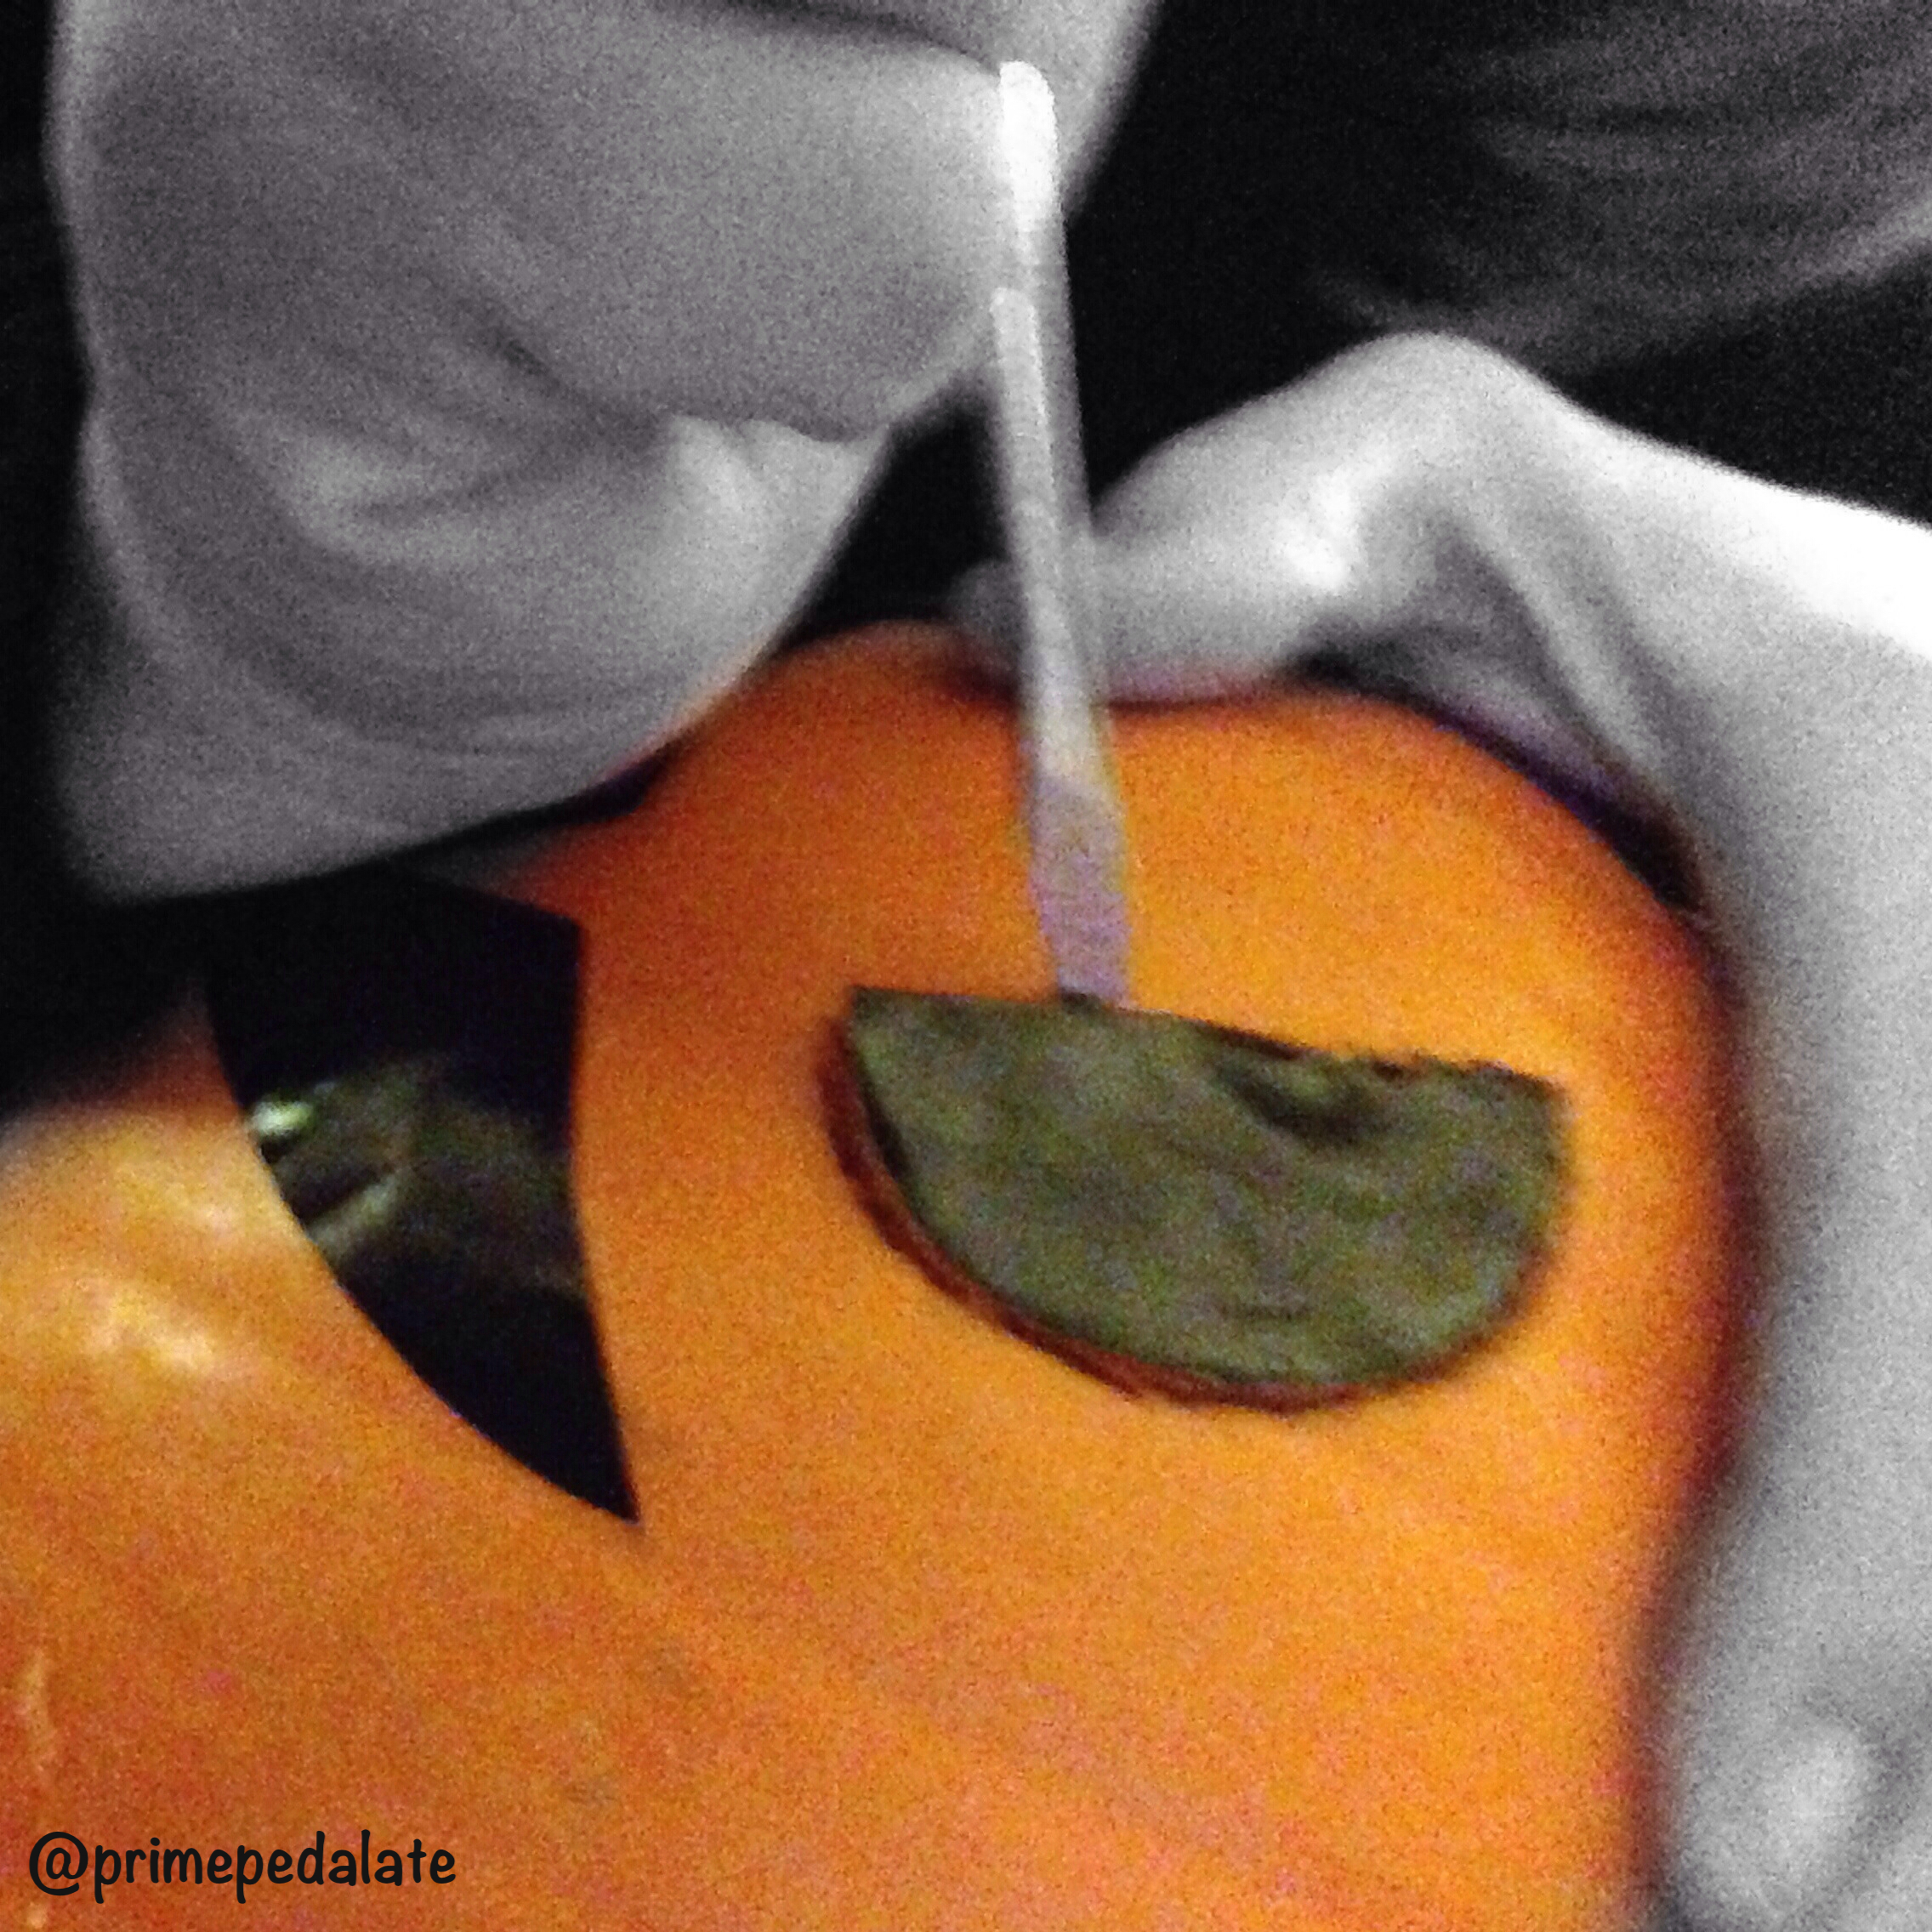
When you are done, remove the paper stencil and you will have a clearly marked outline of where you have to carve the face. You can now carve your pumpkin with a short sharp knife.

Grasp the knife like a pencil

Grasp the knife like a pencil and hold it at a right angle to the pumpkin. Move it steadily up and down, working from dot to dot.

IMG_3439When you are done, simply knock out the carved pieces and now trim up the edges, angles, corners and inside of the pumpkin with a knife.

IMG_3424

Place your candle inside, turn the light off and

my halloween pumpkin

BOOOOOOOOO!!! Happy Halloween!

Advertisement

Bike-shaped cookies!

(Versione in italiano qui)

While my friend Monica is finding any possible excuse in the world to postpone our next cycling ride,  I thought, in the meantime, to take the opportunity to share with you something different, but always linked to the cycling world.


I really like when I get the chance to be creative with my two little girls. I love arts and crafts and baking cakes and cookies with them. I love to see  the joy and enthusiasm in their eyes !

 Here come a recipe for something delicious for my husband, who is a  big big fan of cycling!


Bicycle-shaped cookies with custard cream and berries

Road bike cookies

We used the Thermomix , so I’ll put both the recipes – with the Thermomix and with the traditional method – Before you begin, though, let me remind you, if you are going to use frozen berries, to remove them from the freezer and put them to drain.

Let’s start !


Ingredients for cookies:

125 gms soften butter
100 gms caster sugar
2  medium eggs
400 gms plain Flour
½  a bag of vanillin
½ teaspoon of baking powder
Just a little bit of salt
zest of ½ lemon


With the Thermomix


1)   place strips of lemon zest in the Thermomix  bowl. Process for 20 seconds , speed 9.

 2) Add in all the other ingredients  30 sec. , speed 7

Empty the bow and place the mixture onto a table and roll it. I usually divide the dough  in two parts so that both my daughters can have fun at the same time. Then wrap the doughin cling film and rest in the refrigerator for about one  hour.

Traditional method

Place all ingredients on a counter and knead well until the dough has a smooth texture and gets firm. Wrap in a cling film  and let it rest in the refrigerator for at least one hour.

AND NOW……

( pre-heat the oven at 180 degrees)

1 ) Coat the baking tray with wet parchment paper

2) Take the dough from the fridge and I put on a lightly floured surface.  Divide the dough into small pieces and flatten them with your hands, to around half a centimeter thick.


3) Use your cookie cutters. ( for the wheels of the bike, we used a circle cookie cutter, for the other parts of the bike, we used an umbrella-shaped cookie cutter; we used only the part of the handle and with then used our hands to find make other shapes according to our needs).

4) Place the cookies on the baking tray

5) Bake until their browning at 180 °

CUSTARD CREAM RECIPE

Ingredients:

500 g of  whole  Milk
100 g of white Sugar
2 Eggs
60 g of Flour
1 Untreated Lemon Peel
1 small bag of Vanillin


with the Thermomix:


Place the lemon peel and the sugar in the mixing bowl 20 Sec. Speed 9

Add in the other ingredients  8 Min. 90°C Speed 4

Traditional Method :


In a medium saucepan heat the milk  
to just below boiling point.

Peel yellow skin from lemon and grate

In another saucepan mix together the eggs, sugar and flour to get a smooth paste. (I used an electric mixer, but if you are the Bionic woman, hands are fine)

Add the Vanillin


Slowly pour over the hot milk and stir well, cconstantly, with a wooden spoon. Cook  until the custard thickens. When the cream is ready, pour into a bowl and cover with grin film, let it cool down  to room temperature.


———————————————————————

When both the cookies and the custard cream cooled down enough, you can start decorating them!Top the cookies with the custard cream and then with the berries.

 Bicycle-shaped biscuit


With the remaining dough we made more cookies , putting the dough in the oven in molds in the shape of heart , but hearts are off topic
! 😉

cooking with kids


Bike Anatomy

( Italian version: here)

The other night in bed I read  ” Bicycle” magazine , and this sounds unbelieveble for two main reasons: the first one is because it is usually impossible for me to be able to find the time to read at night as, in general, while I’m trying  to make my daughters sleep, I fall asleep before them. And then because I have so many books next to my bed waiting to be read. But that night I chose and I repeat , I  CHOSE to read a bike magazine .

Every three words , however, I found myself asking my husband, who was reading a history book, that I wouldn’t read even if I was obliged under torture, to explain the meaning of what I was reading.
“Sorry … what’s the sprocket ?”
” What do they  mean  with Gran Fondo ? “
” So if our bikes are not suitable for Grand Fund and not even for racing , what are they for? “

And so on …

Usually  my husband , the second time I interrupt his reading gets quiet annoyed and starts pretending not to hear me.  ( in his defense I must admit that all the possible questions I want to ask him come to my mind always and only when we go to sleep and he is reading … )

But this time it’s different.  Since we aren’t  dealing with family matters , but with his first and true  (and probably only) love, and by that I mean, of course,  the cycling world,  I notice that he is listening to me and I keep on asking him many questions. And he gives me very accurate and, apparently,  very clear  answers.
I pretend to understand nodding.

I do not know whether he believes be or not, but this allows him to go ahead reading  , which is great.

But since that night I decided that I would study. And I have . Oh … yes I have ! I looked at a dozen of Italian and foreign websites and then, with my own hands, I created this image using a new Pinarello bike , that would be my dream, but it would be super surely too professional for me.And here’s the result. I hope it will be useful for  those who, like me, have only recently started bike riding and the ones who have fallen in love with it.

 bike-components

PS : I then removed the names of the bike compoments and add numbers instead.  I made a list from 1 to 35 and checked ho many of them I could remember: the result was that I remembered as many as did before making the picture. ( ie : handlebar brakes, pedals , wheels and little else )
I feel like when I took the General Linguistics . I studied a lot. I got a good grade.  I walked out of the classroom exam and I had already forgotten everything .

Basically, it really is a mission impossible to me!

Hope you’ll have a better result!  You can have a try! Good luck!

Here the bike with the numbers, followed by the list of numers and then, below the solution. Don’t cheat!!! 🙂

Bicycle parts

1 _ _ _ _ _ _ _ _ _ _ _ _  _ _ _
2 _ _ _ _ _ _ _ _ _ _ _ _  _ _ _
3 _ _ _ _ _ _ _ _ _ _ _ _  _ _ _
4 _ _ _ _ _ _ _ _ _ _ _ _  _ _ _
5 _ _ _ _ _ _ _ _ _ _ _ _  _ _ _
6 _ _ _ _ _ _ _ _ _ _ _ _  _ _ _
7 _ _ _ _ _ _ _ _ _ _ _ _  _ _ _
8 _ _ _ _ _ _ _ _ _ _ _ _  _ _ _
9 _ _ _ _ _ _ _ _ _ _ _ _  _ _ _
10 _ _ _ _ _ _ _ _ _ _ _ _  _ _ _
11 _ _ _ _ _ _ _ _ _ _ _ _  _ _ _
12 _ _ _ _ _ _ _ _ _ _ _ _  _ _ _
13 _ _ _ _ _ _ _ _ _ _ _ _  _ _ _
14 _ _ _ _ _ _ _ _ _ _ _ _  _ _ _
15 _ _ _ _ _ _ _ _ _ _ _ _  _ _ _
16 _ _ _ _ _ _ _ _ _ _ _ _  _ _ _
17 _ _ _ _ _ _ _ _ _ _ _ _  _ _ _
18 _ _ _ _ _ _ _ _ _ _ _ _  _ _ _
19 _ _ _ _ _ _ _ _ _ _ _ _  _ _ _
20 _ _ _ _ _ _ _ _ _ _ _ _  _ _ _
21 _ _ _ _ _ _ _ _ _ _ _ _  _ _ _
22 _ _ _ _ _ _ _ _ _ _ _ _  _ _ _
23 _ _ _ _ _ _ _ _ _ _ _ _  _ _ _
24 _ _ _ _ _ _ _ _ _ _ _ _  _ _ _
25 _ _ _ _ _ _ _ _ _ _ _ _  _ _ _
26 _ _ _ _ _ _ _ _ _ _ _ _  _ _ _
27 _ _ _ _ _ _ _ _ _ _ _ _  _ _ _
28 _ _ _ _ _ _ _ _ _ _ _ _  _ _ _
29 _ _ _ _ _ _ _ _ _ _ _ _  _ _ _
30 _ _ _ _ _ _ _ _ _ _ _ _  _ _ _
31 _ _ _ _ _ _ _ _ _ _ _ _  _ _ _
32 _ _ _ _ _ _ _ _ _ _ _ _  _ _ _
33 _ _ _ _ _ _ _ _ _ _ _ _  _ _ _
34 _ _ _ _ _ _ _ _ _ _ _ _  _ _ _
35 _ _ _ _ _ _ _ _ _ _ _ _  _ _ _

 The solution is below….

I said below….

don’t cheat!

ok, it’s coming…

here it is!

bike-components-with-number

Below you will find the solution

I said below

Don’t cheat!

Here it comes

My first uphill – Brescia – Sant’Eusebio and back

As I wrote on my Facebook page,as soon as I just got at the top of the hill of Sant ‘ Eusebio : “Beyond all expectations … from Brescia to the hill of Sant Eusebio , 20 km, 500 meters in altitude. You can do whatever you want to do, if you really want it and I did I ! ”
I did not know , frankly, that I would have made it , but in the end , I hoped so ! When I was a child, I used to come this way to go the mountains and I hated it because of the uncountable  curves … and I always felt sick. Imagine on a bike!
I left Brescia , as usual  and  took the Triumplina road . Nightmare. I would have like to go back home immediately . Traffic, non-existent or impractical cycling path. Then we turn right towards Nave. I am already tired.  Here the traffic begins to decrease and it goes more secure (in the sense : with less fear of having an accident ) . And just after Caino , the climb begins.  It was the first time I did it and I must say that I stopped at least 3 times during the climb. The official excuse was that I was thirsty and I had to stop and drink slowly , the real one is that I felt like dying !
In fact, now that four months have passed since the first time , looking back , it seems almost impossible that I found the climb so hard , because it’s a soft, pleasant, uphill. However, when , FINALLY , I got to the top, I was super happy!


After the photo that immortalized my climb to the top, we went down from Vallio Terme. For this descent , which is beautiful , it would be advisable to have a jacket . I had , but I hadn’t fully zipped it, which produced a parachute effect …not the best thing to be done.

The road is very steep .
after nearly 6 months of bike and more than 1500 km, I have not yet learned to hold the handlebars from the bottom, and now I sincerely cataloged this thing in my personal  folder of the missions impossible ( in which we find also: understand a spy movie , let the plants on my terrace to survive … ) . Pedaling down towards Vallio Terme not knowing how to brake from the bottom of the handlebar, means horrible fingers cramps!

IMG_8725
Then we arrived in Gavardo , you resume the path and back to Brescia.

After the effort of the climb , a bit of flat cycling path can only warm the heart ! 🙂 Very nice ride !